This guide shows you how to enable forwarding on a users mailbox:
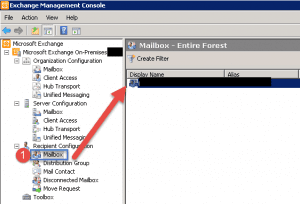
- Open up the Exchange Management Console.
- Expand Recipient Configuration.
- Click Mailbox.
- On the right hand side double click the mailbox you want to modify.
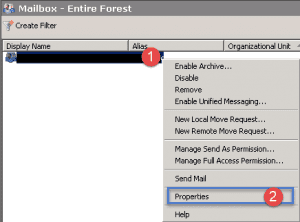
- Step 1 -> Right click on the user account.
- Step 2 -> Click on Properties.
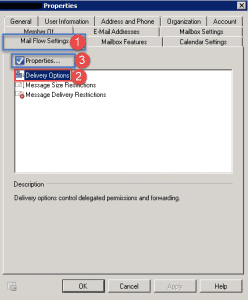
- Step 1 -> Click on the Mail Flow Settings Tab.
- Step 2 -> Click on Delivery Options.
- Step 3 -> Click on Properties.
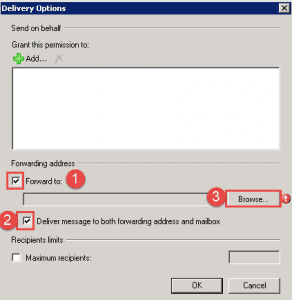
- Step 1 -> Click on the checkbox to enable forwarding.
- Step 2 (optional) -> you can select the option to deliver mail to both mailboxes.
- Step 3 -> Click the Browse button.
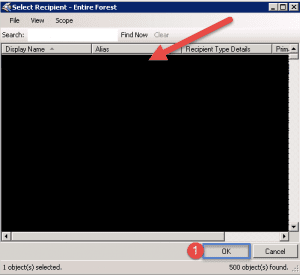
- Select the user or group from the list and then click on OK.
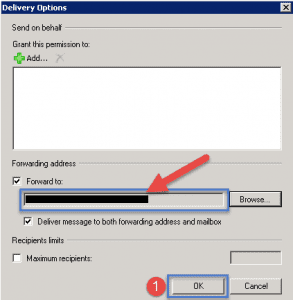
- The address will now show in the text box as shown above.
- Click OK.
- Back at the main mailbox settings window click Apply and then OK.
Hope it helps.
