This guide shows how to publish OWA and Autodiscover from WAP (Web Application Proxy) as well as importing the Certificate to use for the rule.
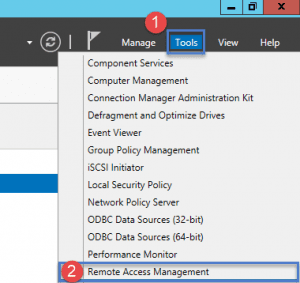
- On the Web Application Proxy (WAP) Server, open up Server Manager and then click on Tools and then Select Remote Access Management.
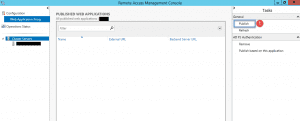
- Once you Remote Access Management has opened you will see a screen as shown above.
- Step 1 -> Click on the Publish button/link to start the wizard.
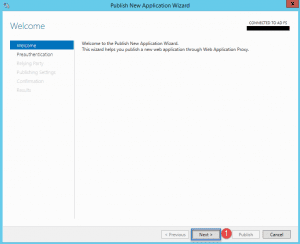
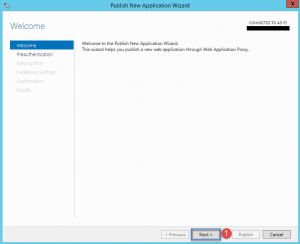
- Step 1 -> Click the Next button to start.
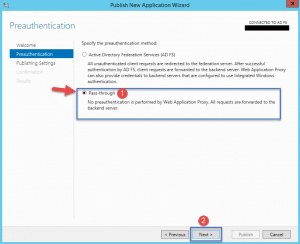
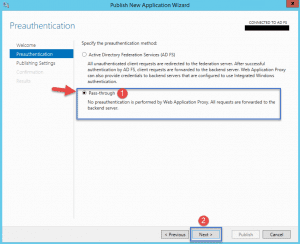
- Step 1 -> Select Pass-through.
- Step 2 -> Click Next to continue.
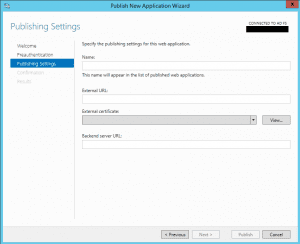
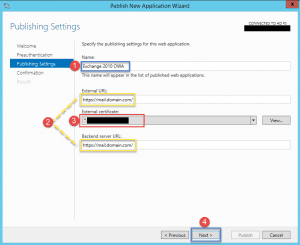
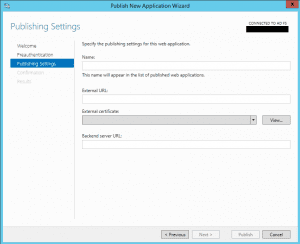
- The Publishing Settings will show.
- Here you will enter in the friendly name for the rule, the URLs and you need to select your certificate. We will cover the certificate installation next.
Installing Certificate into the Private Store.
- Open up MMC, you can click start -> run and type MMC and press enter.
- After the console window has opened then:
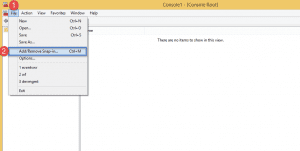
- Step 1 -> Click on File.
- Step 2 -> Click on Add/Remove Snap-in
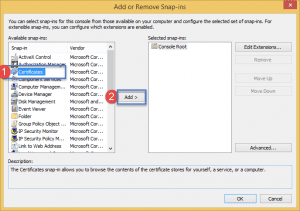
- Step 1 -> Click on Certificates
- Step 2 -> Click on the Add > button
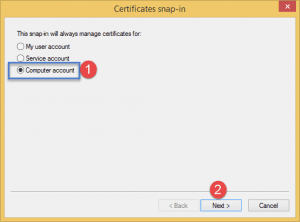
- After you click add button the window above will appear:
- Step 1 -> Select Computer Account
- Step 2 -> Click Next
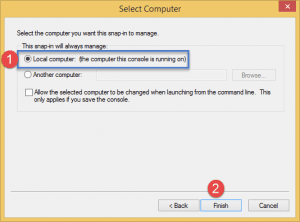
- Step 1 -> Make sure Local computer is selected.
- Step 2 -> Click Finish.
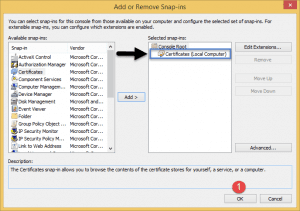
Once everything has been selected in the above steps the selected snap-in will show on the right.
- Step 1 -> Click Ok.
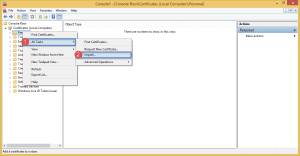
- Step 1 -> Right click on Personal and select all tasks.
- Step 2 -> Click on Import.
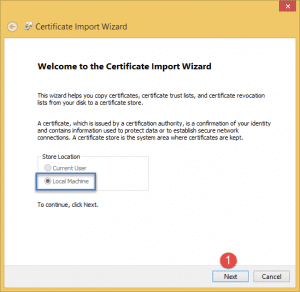
- Once you have clicked Import the above window appears. Click Next to continue.
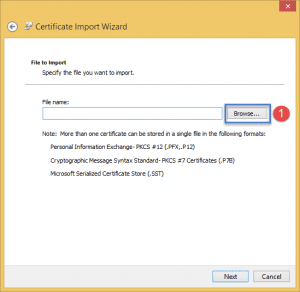
- Step 1 -> Click on the Browse button. Locate your certificate.
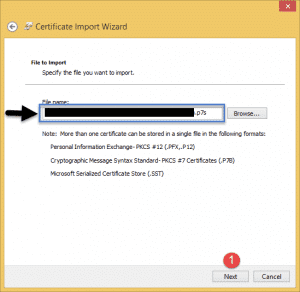
- Once you have selected your certificate it will show in the box (as above), click Next.
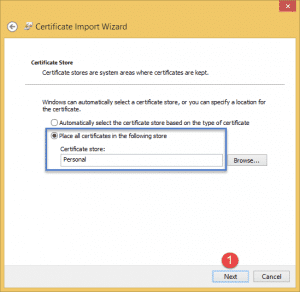
- Leave the selected option as shown above and then click Next.
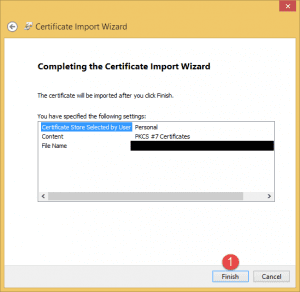
- Click on Finish.
Continuing with publishing the URL on WAP:
- Step 1 -> Friendly name has been entered for Outlook Web Access (OWA).
- Step 2 -> Once you enter in the External URL the Backend Server URL will auto populate. Don’t forget the / after the URL or you will get an error.
- Step 3 -> Select the certificate that you imported in the previous step.
- Step 4 -> Click Next.
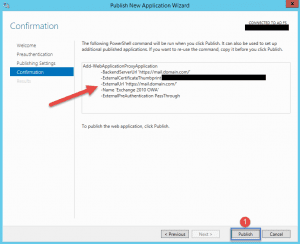
- You can confirm all the information you just entered.
- Final step is to click the Publish button.
- If it is successful the Results page will show as completed and you can click Finish.
Publishing Autodiscover:
The same process applies as with publishing OWA. Click on the Publish Button/Link again to start the Wizard.
- Step 1 -> Click the Next button to start.
- Step 1 -> Select Pass-through.
- Step 2 -> Click Next to continue.
- The Publishing Settings will show.
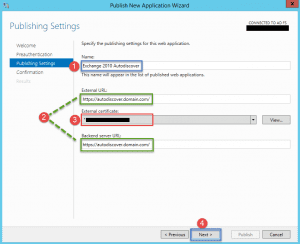
- Here you will enter in the friendly name for the rule, the URLs and you need to select your certificate.
- Step 1 -> Friendly name has been entered for Autodiscover.
- Step 2 -> Once you enter in the External URL the Backend Server URL will auto populate. Don’t forget the / after the URL or you will get an error.
- Step 3 -> Select the certificate that you imported earlier on.
- Step 4 -> Click Next.
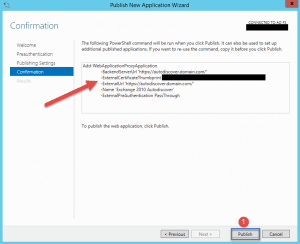
- You can confirm all the information you just entered.
- Final step is to click the Publish button.
- If it is successful the Results page will show as completed and you can click Finish.
Hope it helps

